Removing the background from an image is one of the quickest ways to make a PowerPoint slide look sharper and more professional. Whether you want to float a product photo over a colored background, drop a company logo onto a dark slide without a white box around it, or layer a person cutout over a custom backdrop, PowerPoint has built-in tools that let you do this without leaving the application.
This guide covers three methods, so you can pick the right one for your image:
Method 1: Remove a complex background using the Remove Background tool
PowerPoint's Remove Background tool uses edge detection to automatically identify the subject of your image and mark the background for removal. It works best when there is a clear contrast between the subject and the background. For images with detailed or mixed-colour backgrounds, it also lets you manually refine the selection - which can be a bit time consuming but greatly improves the outcome.
Step 1: Insert and select your image
Make sure your image is already on the PowerPoint slide. Click on the image to select it. Once the image is seleted, you will see the Picture Format tab appear in the ribbon at the top.
Tip: Before removing the background, it's worth cropping out any blank space or unnecessary areas around the edges first. Go to Picture Format → Crop and drag the handles inward. A tighter crop gives PowerPoint a cleaner area to analyze, which usually means fewer manual adjustments later.
Step 2: Open the Remove Background tool
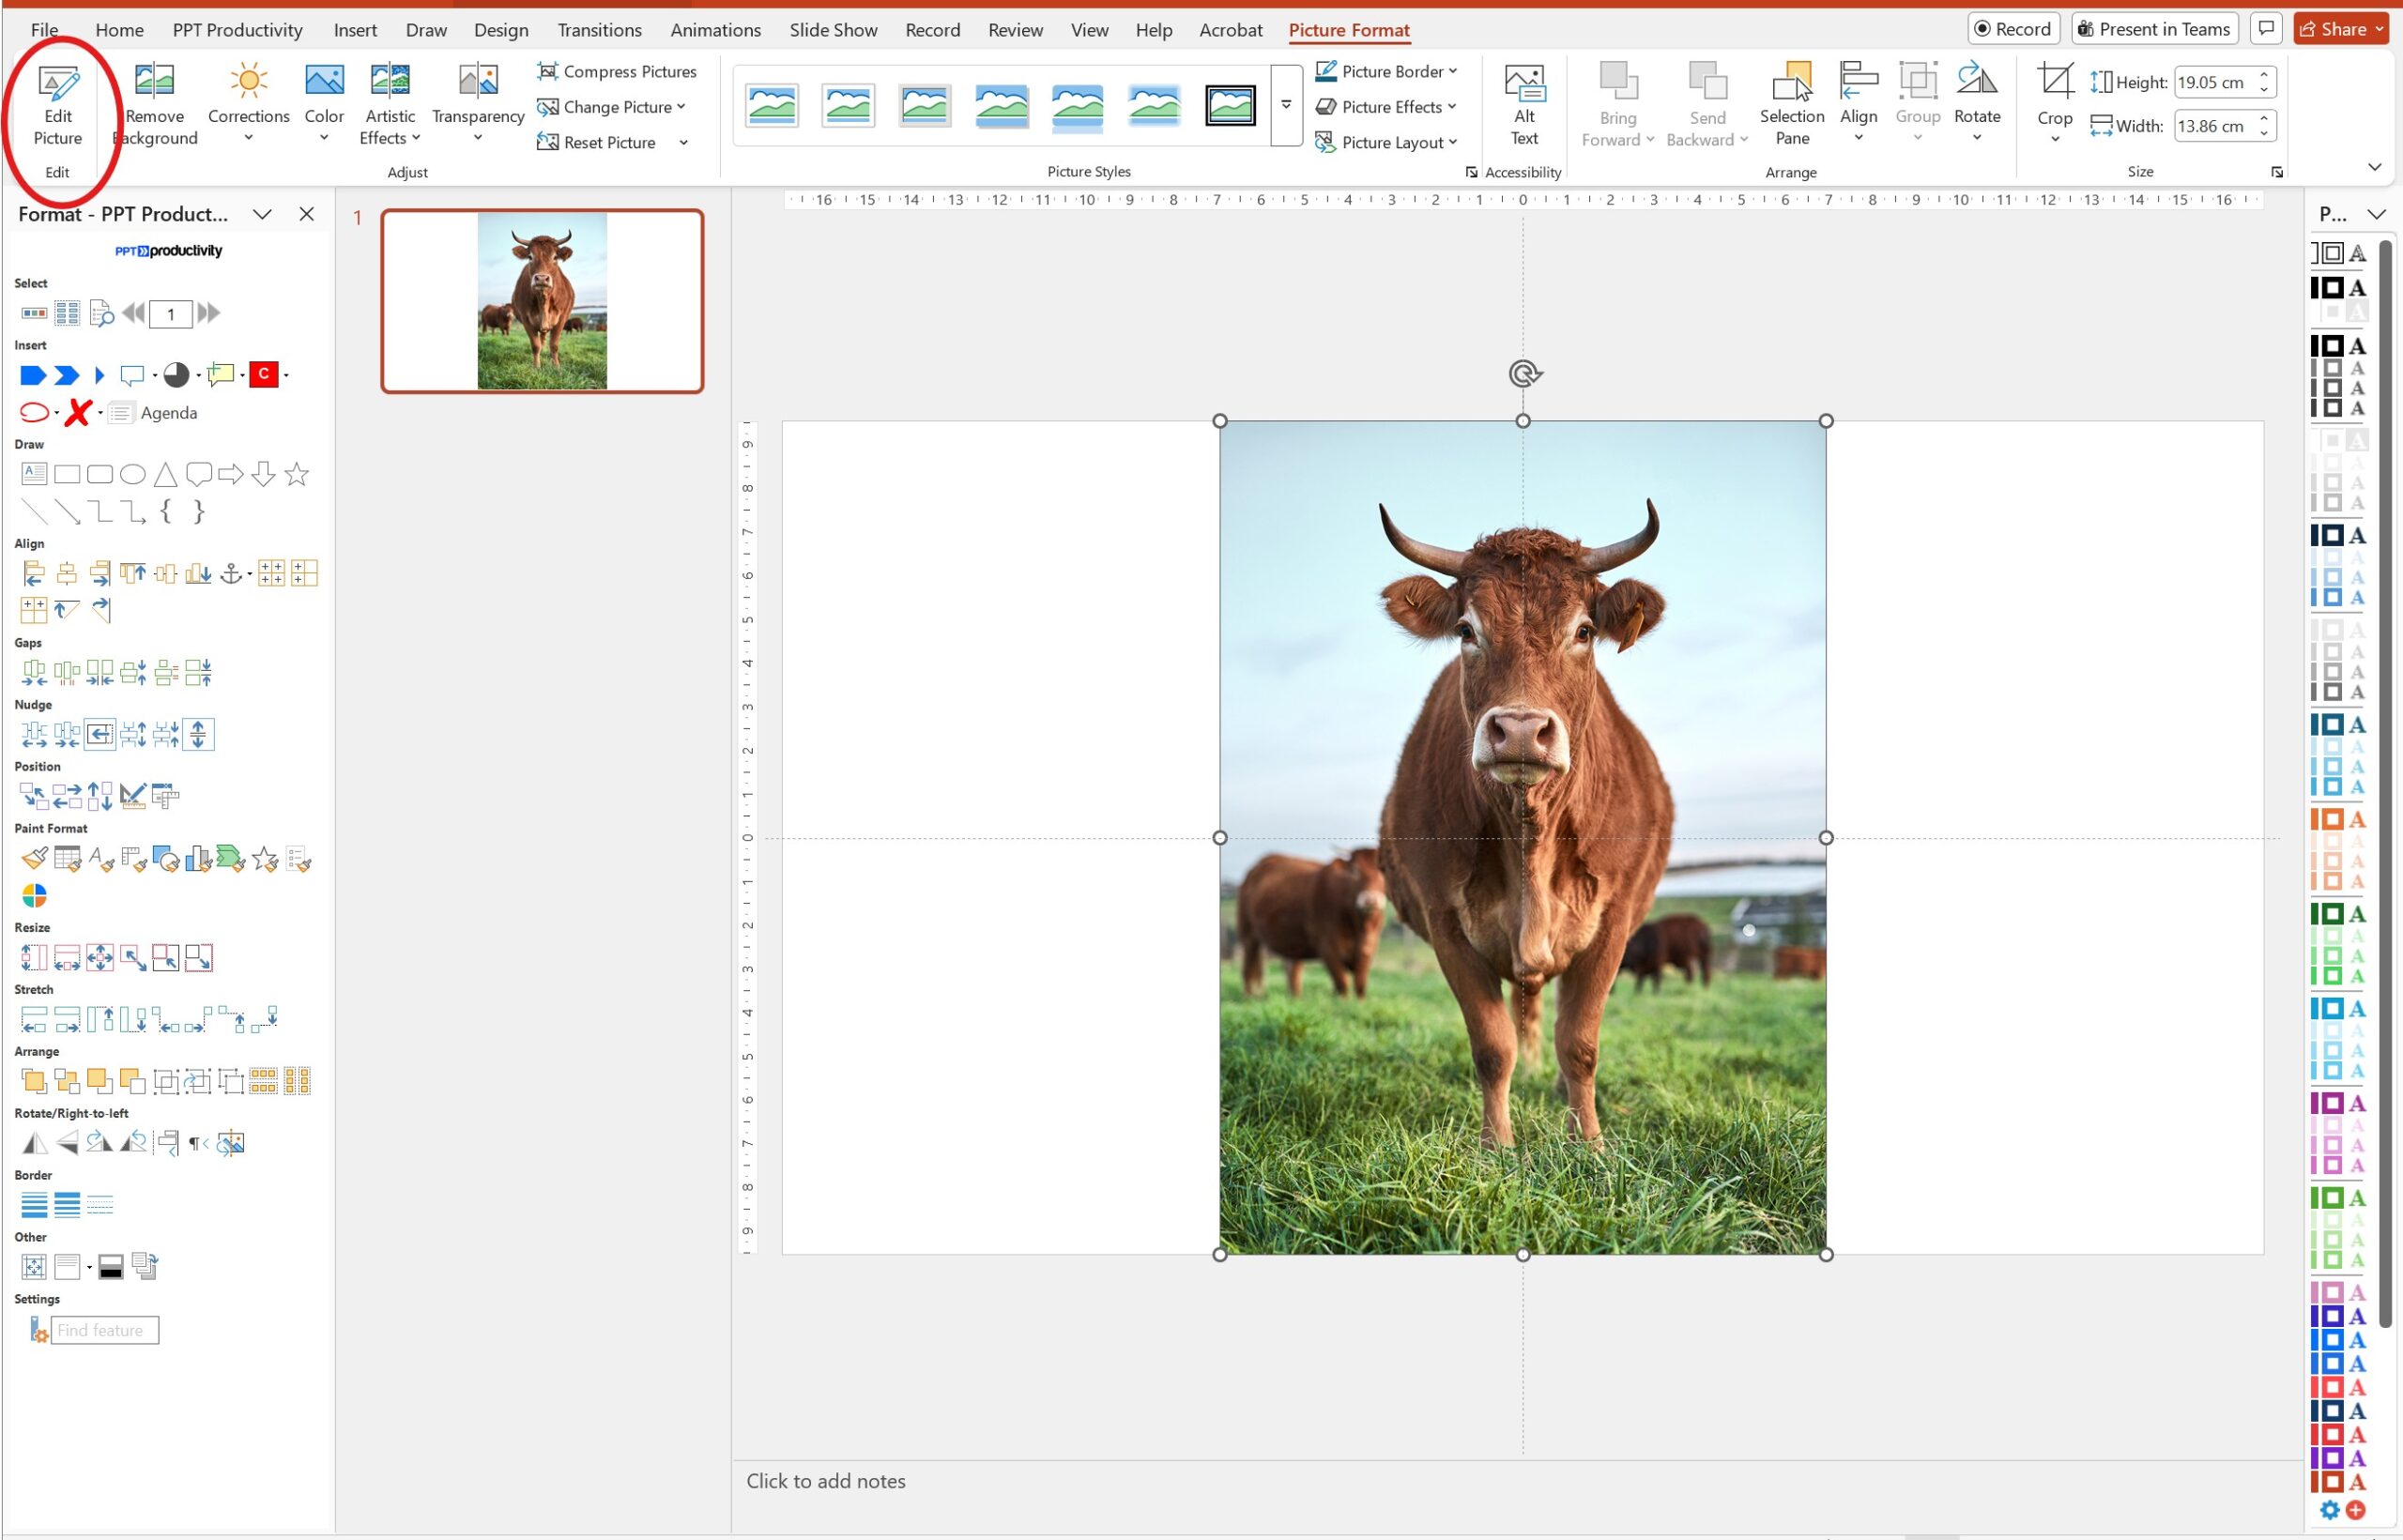
With your image selected, go to the Picture Format tab and click Remove Background in the Adjust group on the left side of the ribbon.
Remove background from image PowerPoint: How to find the Remove background button in PowerPoint
PowerPoint will overlay your image with a magenta (pink-purple) mask covering the areas it thinks are background. The areas keeping their original colour are what PowerPoint intends to keep as the subject.
Remove background from image PowerPoint: Mark areas to keep button and mark areas to remove button
Step 3: Adjust the selection boundary
You will see a rectangular selection boundary around your image. Drag the handles of this box so it fits tightly around your subject. This gives PowerPoint better context for separating foreground from background (and often reduces the amount of manual correction needed).
Step 4: Refine the mask using Mark Areas tools
PowerPoint does not always get the mask right on the first attempt - this is normal. Use the two tools in the Background Removal tab to correct it (the tab will automatically display these tools once you have selected the Remove Background button). The tools for adjusting background removal are:
Mark Areas to Keep: click this, then draw short strokes or dots over any part of your subject that has been incorrectly masked in magenta. PowerPoint will restore those areas.
Mark Areas to Remove: click this, then draw over any background areas that PowerPoint missed and left in their original colour.
Tip: When masking areas to keep or remove, use short, precise strokes rather than long sweeping lines. Short strokes give PowerPoint more accurate guidance, especially around edges with fine detail. Zoom in using Ctrl + scroll (Windows) or Cmd + scroll (Mac) for better precision on detailed edges.
Step 5: Confirm the removal
Once you are satisfied with the mask, click Keep Changes in the Background Removal tab. The background will be removed, leaving only your subject with a transparent background on the slide.
If you want to discard all your changes and start again, click Discard All Changes instead.
Remove background from image PowerPoint: Example using a Stock Image after background removed
Recolor the transparent background area (optional)
After removing the background, you can fill the now-transparent area with a solid color if needed. To do this, select the image, then click your preferred color from the color options on the Home tab. PowerPoint remembers the original image boundaries and fills the transparent area with the color you select.
Method 2: Remove a white or solid-colour background using Set Transparent Color
If your image has a white background, a plain background, or a single flat color that you want to remove (for example a logo on a white square, or a product photo on a solid grey background), the Set Transparent Color tool is faster and more reliable than the Remove Background tool for this use case.
This method removes every instance of one specific colour from the image in a single click. We recommend this option as the best approach for:
Removing white backgrounds from logos
Making a plain-background product or icon image transparent
Cleaning up clip art or icon files with solid fills
Important limitation: Set Transparent Color removes only one color at a time, and it removes all instances of that color in your image. If your background contains gradients, shadows, or multiple shades, some background patches will remain. Equally, if your main image contains areas that are the same color as the background, these will be converted to transparent along with the background - which is not always ideal. For those images, use Method 1 instead.
Steps
Insert your image to your PowerPOint slide, then click on your image to select it and open the Picture Format tab.
In the Adjust group on the Picture Format tab, click Color.
At the bottom of the dropdown menu, click Set Transparent Color. Your cursor will change to a colour picker tool.
Click on the background colour in your image that you want to make transparent. PowerPoint will instantly remove all instances of that exact colour from the image.
Screenshot: Picture Format → Color dropdown with Set Transparent Color option highlighted and a logo with white background
As noted above - PowerPoint removes all instances of the color that matches the background color. In the examples here, we have removed the white background from the PPT Productivity logo. This also removed the white arrows from the middle of the logo. If you are trying to remove a white background from a logo when the logo has white elements that need to be retained, refer back to Method 1.
Screenshot: Logo image after using Set Transparent Color to remove white background
Tip: If small patches of the background colour remain (for example, very light or very dark fringe pixels), you can click on those patches individually with the Set Transparent Color tool, to remove them one at a time. Note that you can also use this tool multiple times on the same image to remove different shades.
Note for Mac users: The Set Transparent Color option in PowerPoint is in the same location on Mac - Picture Format → Color → Set Transparent Color - and works identically.
Method 3: Remove a background using AI (PowerPoint Copilot and PowerPoint Online)
Microsoft has added AI-powered background removal to PowerPoint which is available in two places depending on your subscription. The AI approach is significantly more accurate than the manual tools for complex images, particularly those involving hair, fur, intricate edges, or subjects that blend into the background. Note that if you have the desktop PowerPoint app, we recommend using Method 1 and Method 2 above unless you have a complex image.
Option A: PowerPoint Online (browser version - no Copilot licence required)
PowerPoint for the web includes a single-click AI background removal tool, which is available to all Microsoft 365 subscribers using the browser version.
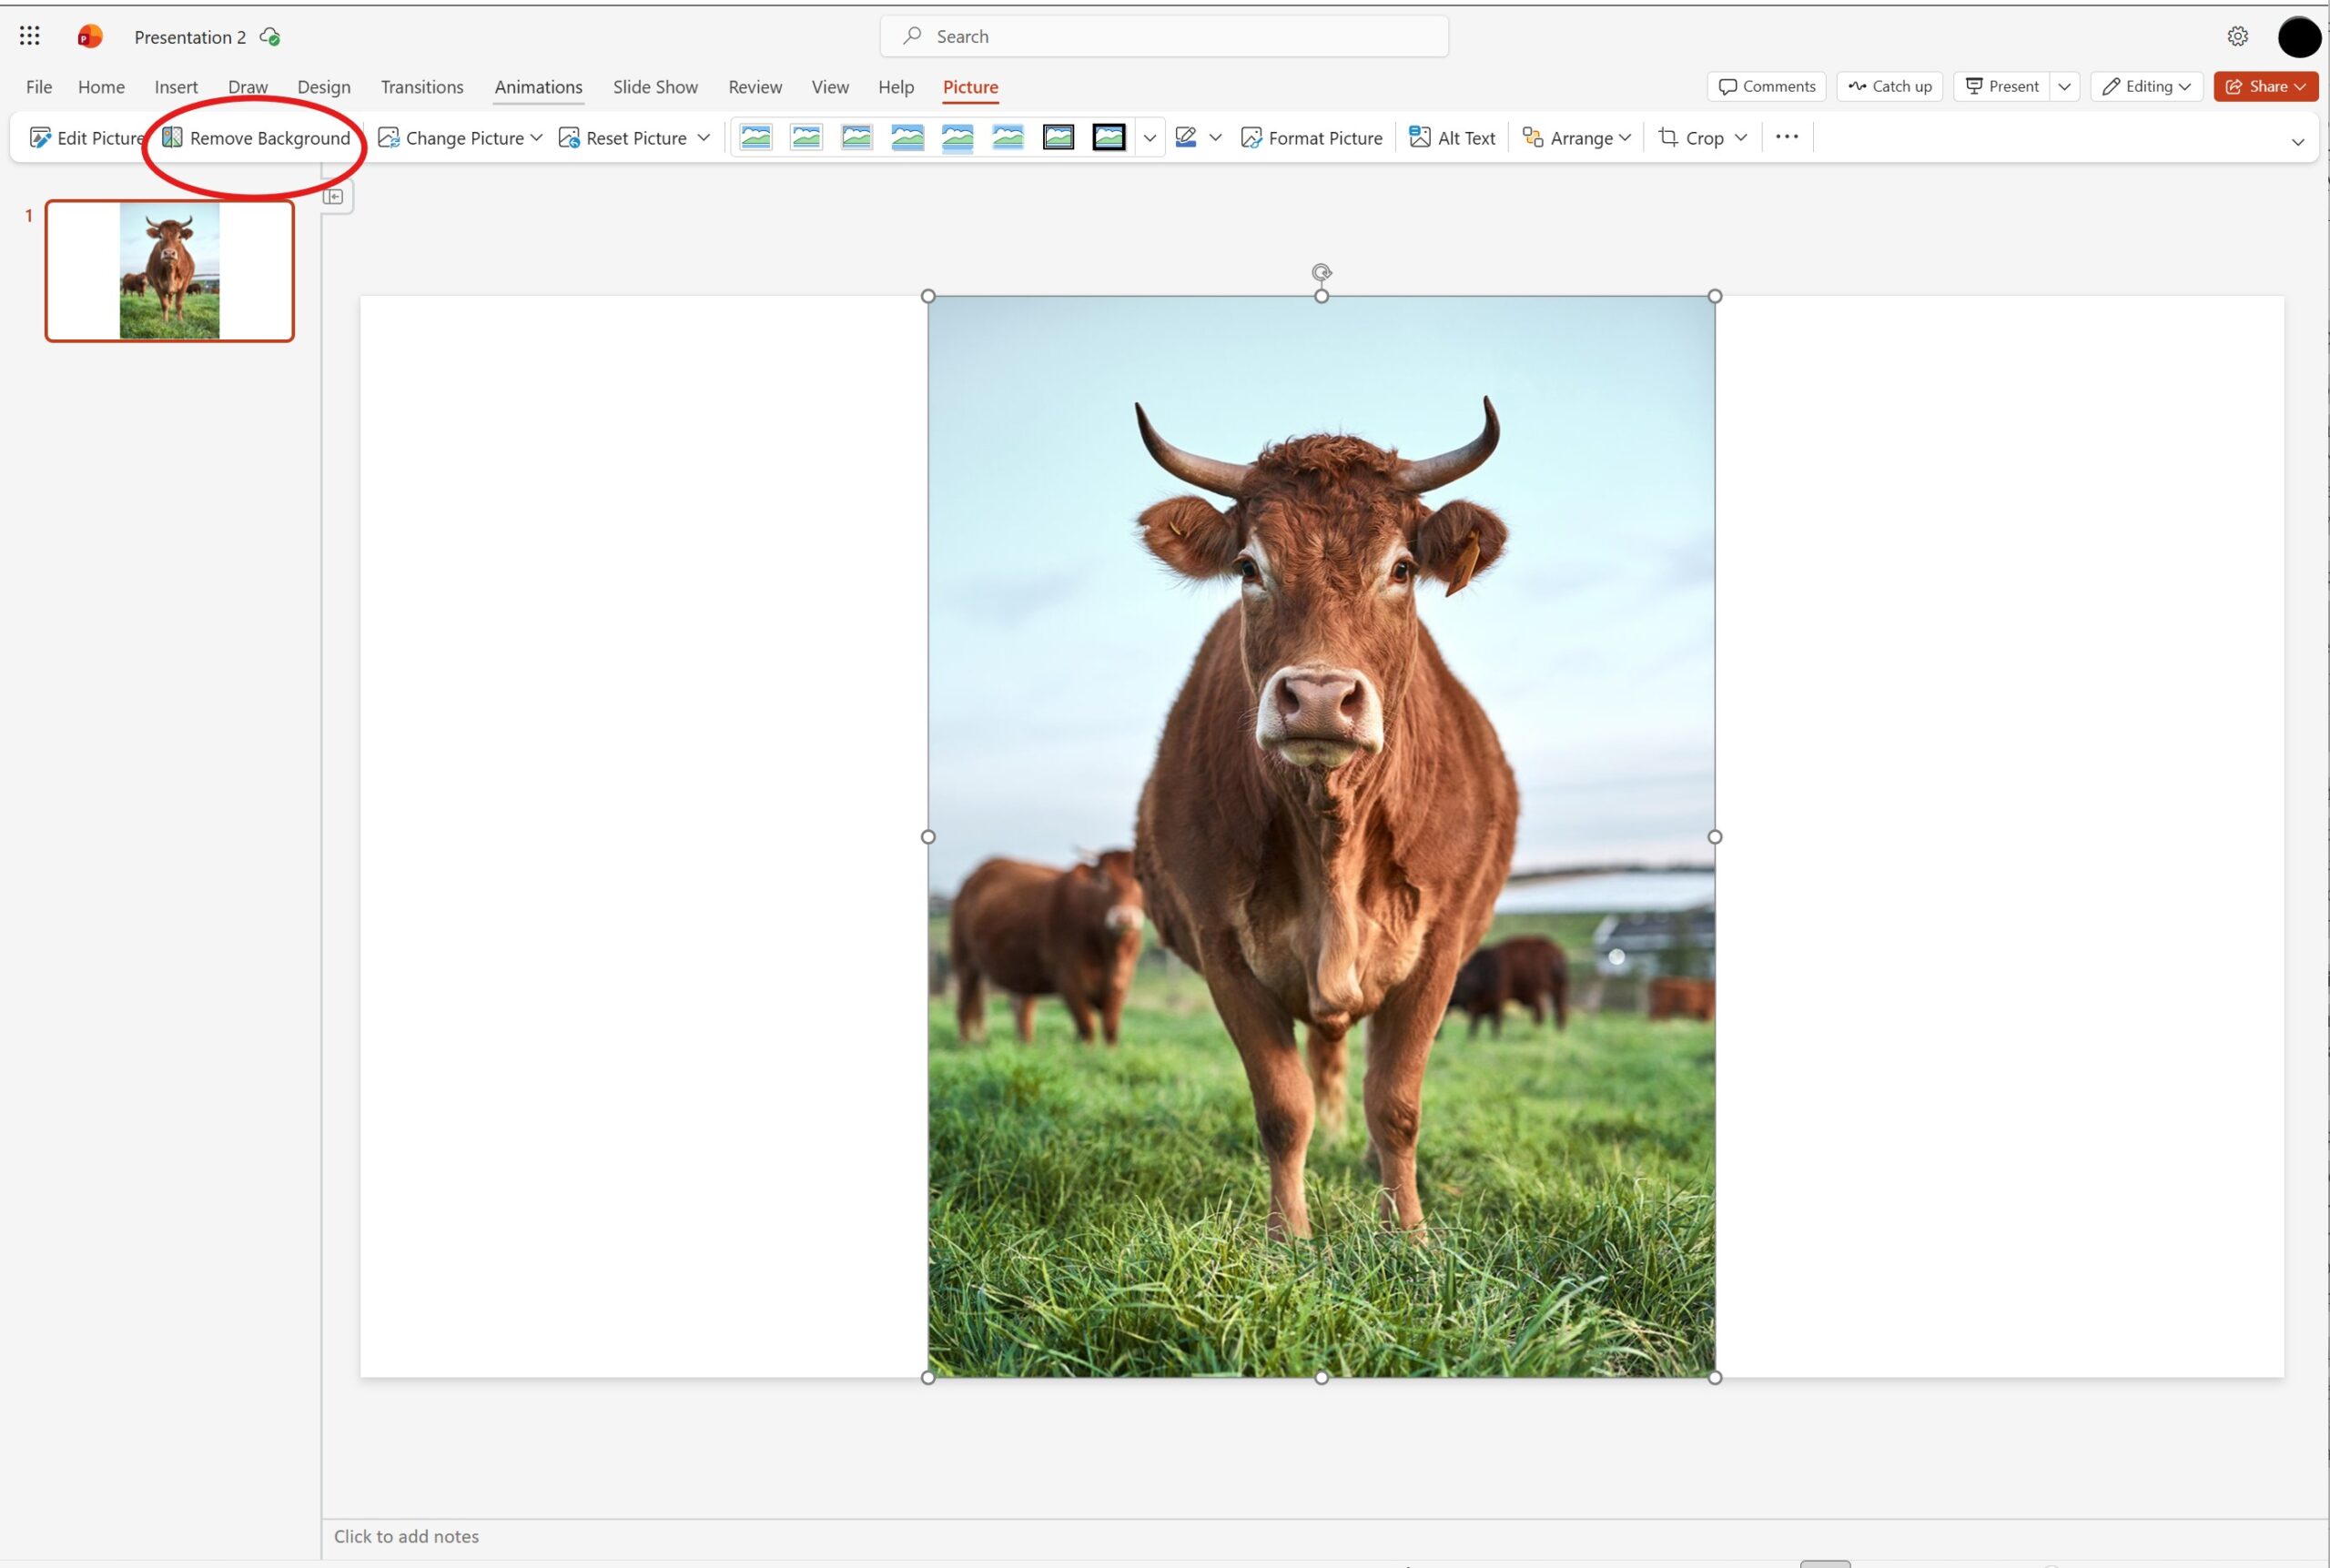
In the Picture tab on the ribbon, click Remove Background.
PowerPoint Online then sends the image to Microsoft's AI service. Note that this takes a few seconds - you will see a brief loading indicator or color overlay while the service is in progress.
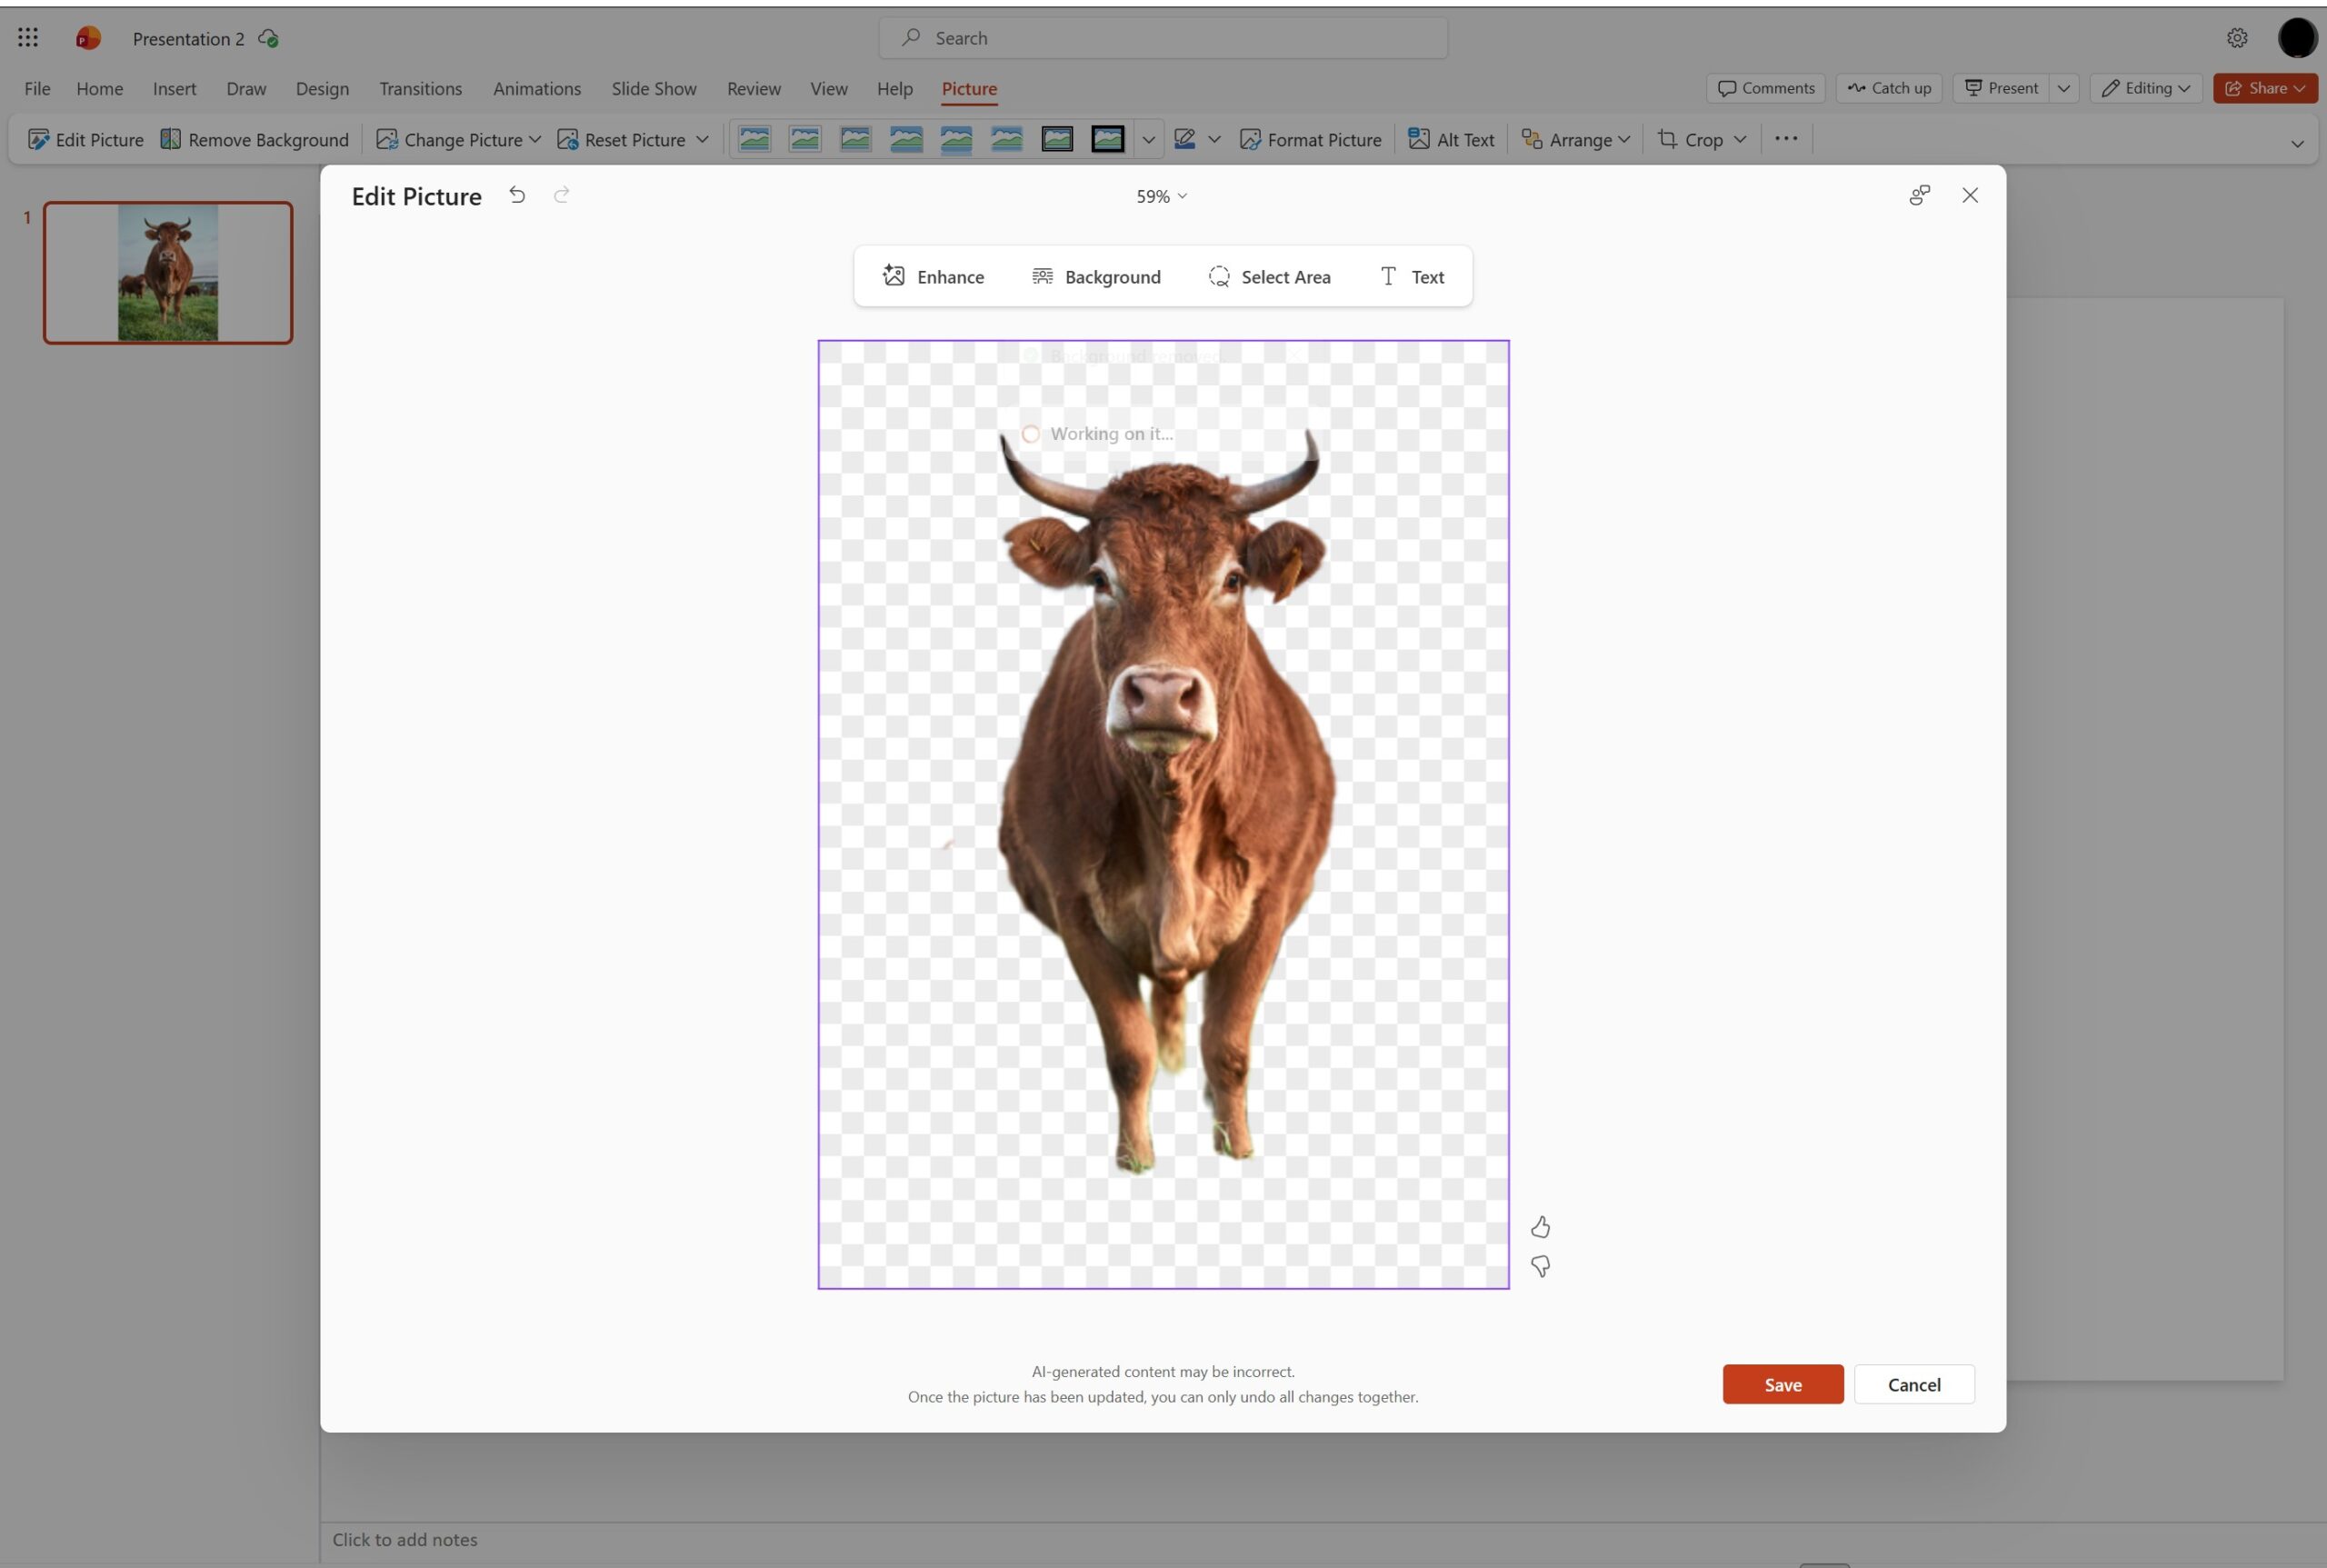
Once the background is removed, you will see options to select a color background or do further editing (use the enhance option if the initial background removal doesnt look quite right)
Click save, and the image will appear on your PowerPoint slide with the background removed.
Note: Unlike the desktop Remove Background tool, the PowerPoint Online version does not let you manually adjust the mask after removal. If the result is not clean enough, you can undo (Ctrl+Z) and try the desktop tool with manual refinement instead.
Screenshot: PowerPoint Online with Picture tab open and Remove Background button highlightedScreenshot: PowerPoint Online showing options after Remove Background to Enhance or recolor
Option B: Desktop PowerPoint with a Copilot licence
If you have a Microsoft 365 Copilot licence, the desktop version of PowerPoint includes an Edit Picture panel with AI-powered background removal that handles complex edges much more accurately than the standard Remove Background tool. Note that we recommend using Method 1 and Method 2 above unless you have a complex image.
Click on your image to select it.
In the Picture Format tab, click Edit Picture on the left side of the ribbon.
The Designer Editor panel will open on the right side of your screen, showing four editing tools. Click Background.
The AI will process your image and remove the background in one step.
Important: If the Edit Picture button appears in your ribbon but is greyed out, this is a licensing issue. The Edit Picture button is visible to all PowerPoint users, but to access the functionality you require an active Copilot license.
Screenshot: Desktop PowerPoint with Edit Picture button highlighted in Picture Format tab
How to save a PowerPoint image with a transparent background
Once you have removed the background from an image, you may want to save it as a standalone file to use in other applications - for example, in Word, another PowerPoint file, or a design tool.
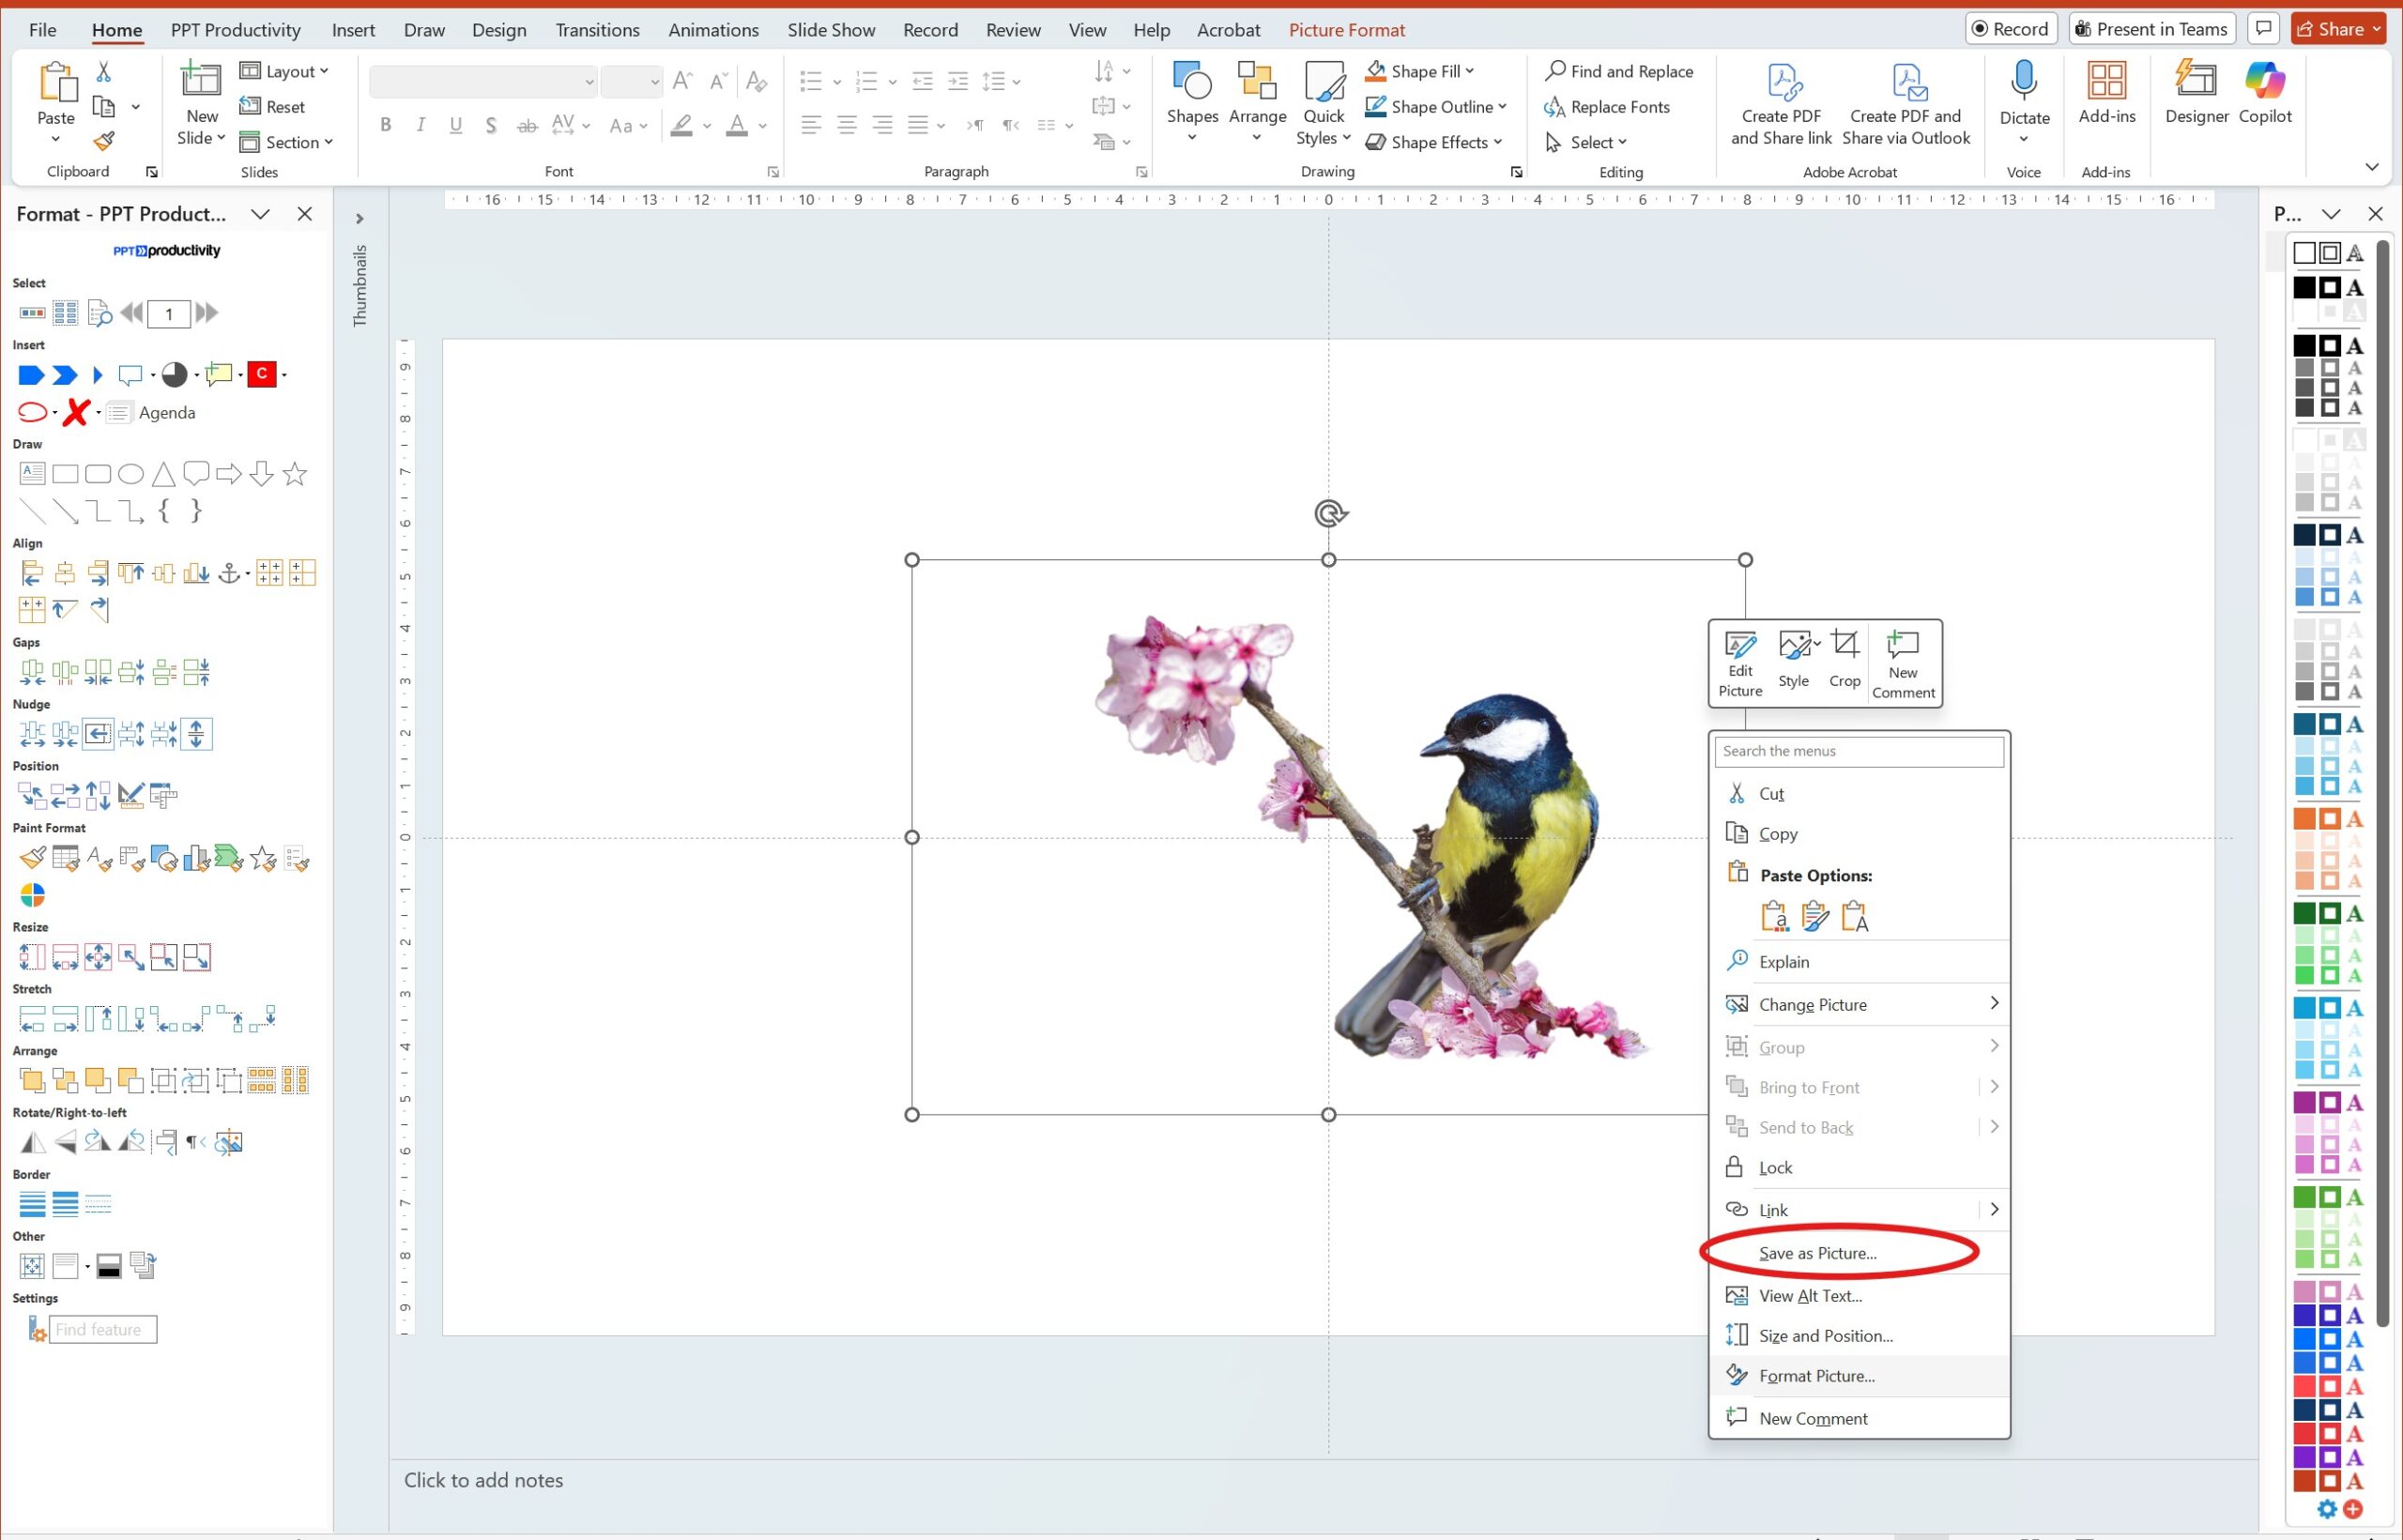
Right-click on the image in PowerPoint.
Select Save as Picture.
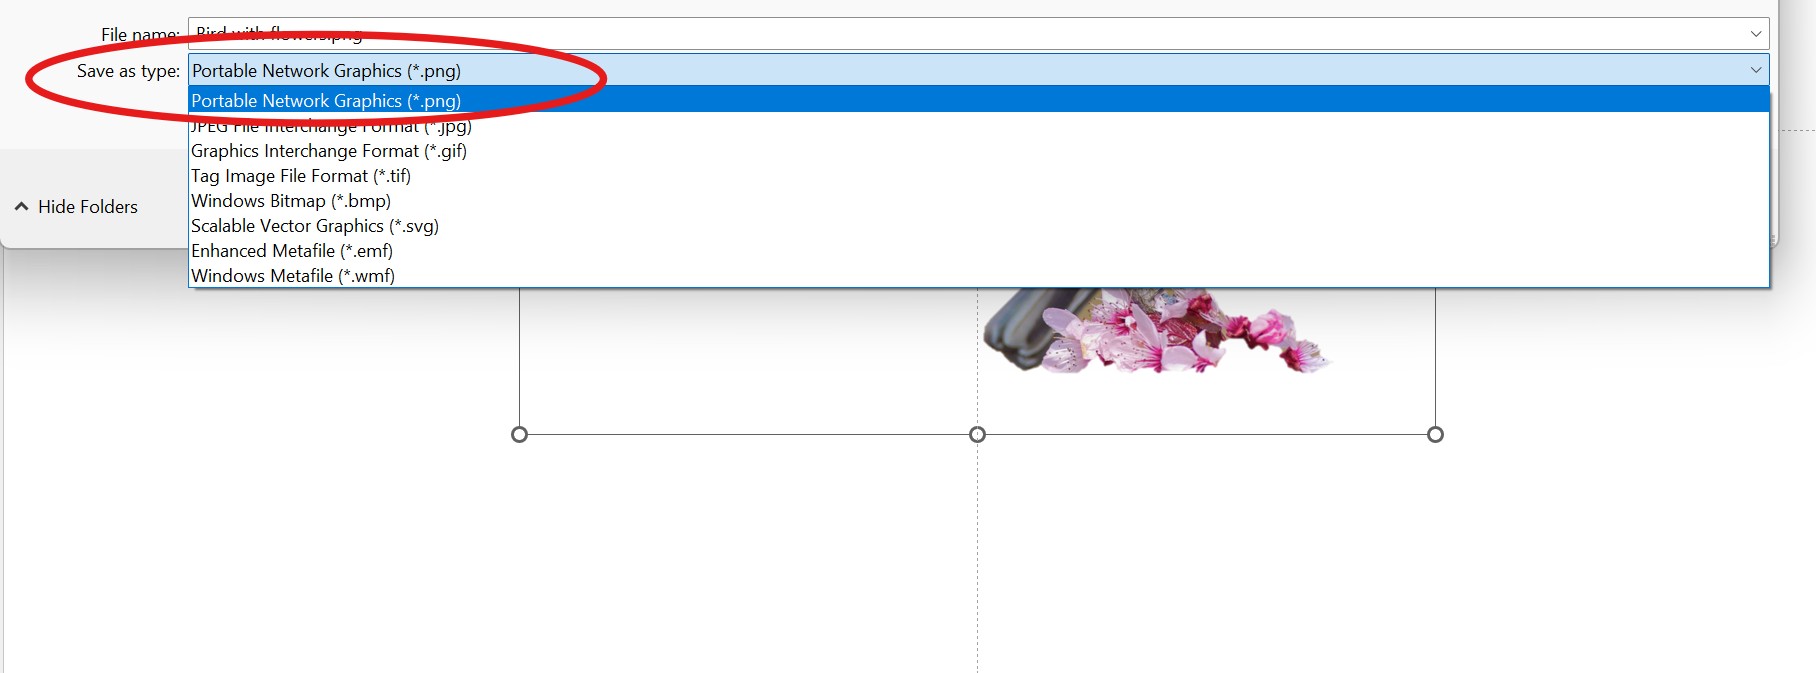
In the save dialog, change the file type to PNG.
Choose a location and click Save.
Screenshot of saving new image with removed background as picture
Note: When saving a picture after removing the background, its important to always save as PNG, not JPG. The JPG format does not support transparency - if you save as JPG, your transparent background will be replaced with a solid white fill. The PNG format preserves the transparent background correctly.
Screenshot how to save new image as png format to retain transparency properties
Troubleshooting: common problems when removing backgrounds in PowerPoint
The Remove Background button is greyed out
There are two common causes:
1. The image is a vector or SVG file. The Remove Background tool does not work on vector file formats including SVG, WMF, EMF, or Adobe Illustrator (.ai) files. You will see the button permanently greyed out when these file types are selected. To work around this, right-click the image, select Save as Picture, save it as a PNG, then re-insert the PNG version - the Remove Background tool will then be available.
2. The image is locked in the Slide Master. If you have selected a placeholder image from the Slide Master rather than an image placed directly on a slide, the Picture Format tools including Remove Background will be unavailable. Switch to a regular slide layout or go to View → Slide Master to edit the image there directly.
PowerPoint cannot identify the background
If PowerPoint struggles to distinguish the subject of your image from the background, the contrast between them is likely too low. Use the Mark Areas to Keep and Mark Areas to Remove tools to manually guide the tool, or consider using Method 3 (AI removal) for better results on difficult images. Alternatively, you could try improving the source image's contrast before inserting it into PowerPoint.
Too much of the subject disappears
If the subject in your image is being partially masked in magenta alongside the background, zoom in on the image using Ctrl + scroll and carefully use Mark Areas to Keep to restore the affected parts. Use short strokes and dots rather than long lines - short strokes give PowerPoint more accurate guidance around edges.
The background has too many colours or textures
Busy, patterned, or gradient backgrounds can confuse PowerPoint's edge detection, leaving uneven results even after manual refinement. In these cases, the AI removal tool (Method 3, Option A via PowerPoint Online) is likely to handle these types of backgrounds better than the standard desktop tool. For highly complex images - for example, subjects with very fine hair detail against a busy background - a dedicated AI background removal tool will give cleaner results than any PowerPoint-native method.
The background looks transparent but turns white when I save
This happens when saving as JPG. JPG does not support transparency and automatically fills transparent areas with white. There is no way to solve this in JPG format, so the solution is to save your image as PNG instead. Refer to the saving section above for steps.
Remove Background works differently on Mac vs Windows
The Remove Background tool is available on both Mac and Windows versions of PowerPoint 365, and works the same way. The main difference is the location of the Zoom tool for precise editing - on Mac, use Cmd + scroll to zoom in rather than Ctrl + scroll on Windows. The Background Removal tab and its Mark Areas tools are identical on both platforms.
Frequently asked questions
Why is the Remove Background button greyed out in PowerPoint?
The most common reasons are: (1) your image is a vector or SVG file, which the Remove Background feature in PowerPoint does not support. Convert it to PNG first by right-clicking and choosing Save as Picture; or (2) the image is embedded in the Slide Master rather than placed directly on a slide. See the troubleshooting section above for step-by-step fixes for both scenarios.
How do I remove a white background from an image in PowerPoint?
The fastest method for white or solid-colour backgrounds is Set Transparent Color: go to Picture Format → Color → Set Transparent Color, then click on the white area of your image. This removes all instances of that colour in a single click. This method works well for logos, icons, and clip art on plain backgrounds. For photos with more complex backgrounds, use the Remove Background tool instead.
Can I remove a background from an image in PowerPoint on a Mac?
Yes. The Remove Background tool (Picture Format → Remove Background) and the Set Transparent Color tool (Picture Format → Color → Set Transparent Color) are both available in PowerPoint 365 for Mac and work identically to the Windows version. Use Cmd + scroll to zoom in when refining edges, rather than Ctrl + scroll as on Windows.
How do I save a PowerPoint image without a background?
Right-click the image on your slide and select Save as Picture. In the file format dropdown, choose PNG (this is essential, as PNG supports transparency). If you save as JPG, the transparent background will be replaced with solid white. See the full saving steps above.
How do I make an image background transparent in PowerPoint without removing it?
If you want to reduce the opacity of a background without fully removing it, select the image, go to Picture Format → Transparency, and choose a transparency level from the dropdown. This is different from background removal, it makes the entire image semi-transparent rather than removing just the background area. For a fully transparent background, use one of the three removal methods above.
Does removing a background in PowerPoint affect the original image file?
No. PowerPoint's background removal tools only affect how the image appears within your presentation. The original image file on your computer is unchanged. If you want to export the edited version as a standalone file, right-click the image in PowerPoint and use Save as Picture → PNG.
Chief Productivity Officer Lee-Ann has been working with PowerPoint for more than 18 years. Lee-Ann was initially an office manager and assistant, then a Production Specialist at Boston Consulting Group. Lee-Ann is now Chief Productivity Officer at PPT Productivity. Lee-Ann nominates PPT Productivity's Remember/Set Size & Position feature as one of her favourite.